DIY patio ideas on a budget
DIY patio ideas on a budget

Key takeaways
Gravel and concrete are the most budget-friendly materials for a DIY patio makeover
Concrete pavers are better than cast concrete for DIY installation
Firepits, outdoor lighting, stepping stones, and other landscaping ideas add pizzazz to a small patio
Looking to expand your outdoor living area on a budget? Start with a DIY patio.
A launchpad for any outdoor project, patios are among the most popular home improvements. According to Yelp’s 2021 Home Trends Report, searches for covered patios jumped 1109% over the previous year; gazebos and pergolas grew by 111%, and firepits and outdoor kitchen look-ups increased as much as 97%.
While a fully loaded patio can cost up to $50,000, it’s possible to create a beautiful “outdoor living room” for a fraction of that price. That means hundreds, not thousands, of dollars for a backyard space that could last 25 years. You may even be able to recoup as much as 50% of the cost on home resale, according to Remodeling magazine.
The following budget-friendly DIY tips will help you build, furnish, and decorate a comfy outdoor patio that’ll extend your living room and welcome family and guests for decades.
Planning the DIY patio: Choose low-cost materials
When planning your DIY patio, keep in mind the cost of materials, which can range from $1–35 per square foot. Flagstone, cobblestone, tile on concrete, colored concrete, and other popular surfaces are the most expensive, and can set you back up to $20,000 for a 20×20 square-foot patio.
It’s possible, however, to build a lovely outdoor space for $500–1,500 using the lowest-cost materials. They include:
Pea gravel
Cast concrete
Concrete pavers

Pro tip: Get the pricey-patio-look-for-less by trawling salvage yards for high-end scraps. You may discover used brick, broken concrete, or other similar materials that can create an affordable but classic-looking surface.
Pea gravel patio

Pea gravel is among the least expensive patio materials. It’s also an easy DIY job that can be handled with minimal skills and effort.
Benefits of pea gravel:
Low cost
Easy installation with basic tools, such as a shovel and rake
Conforms to curved or irregular patio shapes
Drains naturally
Won’t crack like concrete patios
Drawbacks of pea gravel:
It needs an edging boundary to contain it.
Pebbles can get scattered by foot traffic or leaf blowers.
Not as easy as concrete to walk on or roll a barbecue across.
Not as permanent looking or durable as other patios because gravel can easily scatter.
How it’s done: Once the patio area is prepared, you’ll pour pea gravel from large bags onto the surface, rake it out to a 2-to-3-inch bed, and tamp it down. Ideally, you’d also create a border that keeps the patio’s outer edges in place using bricks or flexible garden “benderboard.”
Cost of pea gravel: About $5 per square foot
Cast concrete patio

Cast (poured) concrete is the staple of patio materials, proven over decades for its durability and versatility in millions of backyards.
Benefits of cast concrete:
Smooth, hard, and durable
Conforms to curved or irregular patio shapes
Can be given colored or stamped finishes
Drawbacks of cast concrete include:
Requires professional installation unless you’re an accomplished DIYer
Unforgiving of installation mistakes (they become almost literally “cast in stone”)
Can crack from freezes and thaws
How it’s done: The job typically involves digging a flat base about eight inches deep, adding 4 inches of crushed stone, and building wooden forms that are strong enough to hold the wet concrete. Depending upon the size of the patio, concrete is delivered by truck or mixed onsite. Then, the semi-liquid concrete is poured into the forms and, given a smooth surface before it fully hardens.
Cost of cast concrete: A basic poured concrete patio can cost $3–10 per square foot, installed. A stamped or stained concrete patio typically runs $15–20 per square foot because of the refined work needed.
Concrete pavers patio

A relatively good alternative to cast concrete is setting concrete pavers—square, rectangular, or other brick-like units of concrete—in a bed of sand. This results in a hard, reasonably flat surface that’s friendly to both furniture and bare feet. Many different styles of concrete pavers are available that look like brick, cobblestone, flat concrete, and more.
A paver patio is more permanent and solid underfoot than gravel, and can be installed more easily than concrete cast by DIYers.
Benefits of concrete pavers:
Relatively smooth, hard, and durable
Individual units ease DIY installation.
Drains naturally
Easy to replace units if damaged
Drawbacks of concrete pavers include:
Requires moderate DIY skill
Slightly irregular surface for furniture
Requires several inches of excavation for a gravel and sand base
For best results, gravel bases must be compacted using rental equipment
How it’s done: A paver patio is more complicated than meets the eye. The pavers sit on a 1-inch layer of sand that tops a 6-inch layer of gravel paver base (gravel designed for this purpose).
The gravel is installed over a landscaping fabric that prevents weeds from growing up through the patio. Then, the gravel is wet-down and tamped to form a flat, solid base. This helps keep the patio from becoming wavy after a couple of seasons. It can be tamped manually or with a power compactor.
Fine polymeric jointing sand fills the spaces between the pavers. After being swept into the joints, it’s sprayed with water and hardens as it dries).
Cost of concrete pavers: A good size for concrete patio pavers is 12×12 inches. These cost from $1.50–8 each at home improvement or garden centers, depending upon quality, composition, and any special colors, textures, or characteristics in the castings.
Pro tip: DIYers should consider renting a power compactor from a home improvement center or tool rental supply. The $75/day rental cost is well worth the savings in time and sore muscles.
Installing the DIY patio: Make it level

DIY installation is one of the best ways to save money on a new patio or makeover. It’s easier to do with pea gravel or concrete pavers—than cast concrete and other materials. Unless you’re an accomplished DIYer with experience at pouring concrete, hire a concrete contractor for a cast-concrete patio.
When installing gravel or pavers yourself, you’ll need to prepare the ground surface. Here’s how:
Clear the area by removing debris, plants, and large rocks that might interfere with the layout.
To make the patio level with the ground, dig into grass or dirt so that added material is flush with, or slightly above, ground level.
Make sure the area you dig out or plan to use is level. As a guide, pound stakes into the ground at the corners, stretch strings between them, and use a carpenter’s level to level the strings.
Lay down landscaping fabric to keep weeds from growing.
Depending on the materials you choose for your patio’s surface, further preparation might be necessary, such as installing and tamping gravel, as discussed above.
DIY patio ideas: Install a backyard firepit
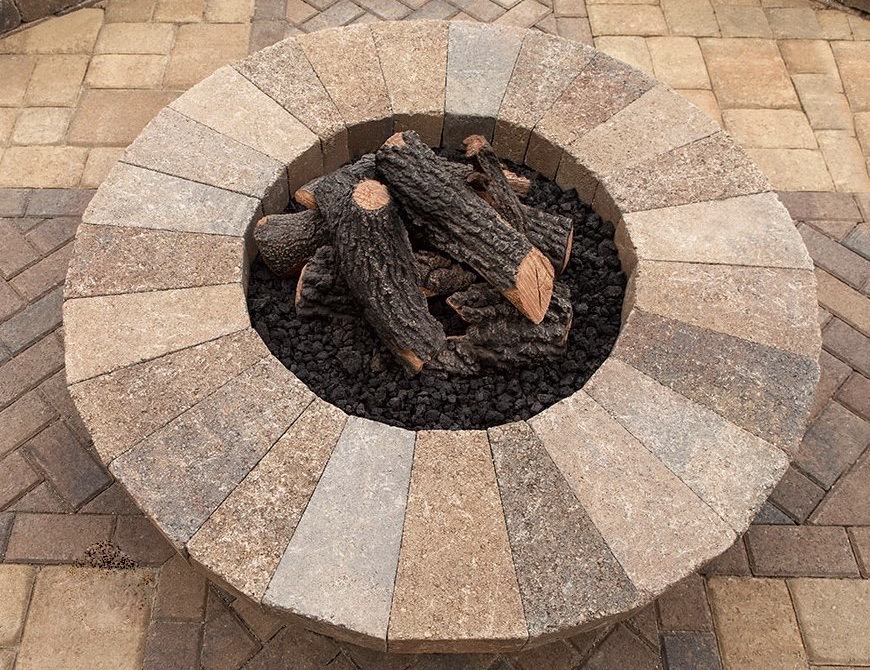
Another way to upgrade your budget patio: Add a firepit. It’ll create a warm, cozy area for gathering family and friends.
Pro tip: You can buy a pre-made portable steel firepit for less than $100 online. Or, build it yourself. DIY firepit kits can be purchased for under $500 at home improvement centers.
Cover your DIY patio

Covering all or part of your patio can shield you and your guests from hot sun and rain. Get the high-end protection of a pergola on a budget using:
Large patio umbrellas
A canopy tent (for under $200)
A “sail” (weather-resistant fabric that stretches over your outdoor seating area and anchors to your home, trees or other sturdy structure)
Add privacy with DIY walls
Adding one or more privacy screens or walls to a new or remodeled patio makes it feel extra cozy. The quick and easy way: Fasten together a series of old doors (commonly found at salvage shops) for a great conversation piece and character-filled focal point.
Pro tip: You can also build an affordable frame out of plastic sprinkler pipe. Spray-painting and draping it with weather-resistant fabric adds a dash of elegance to a small backyard, and makes a big yard feel like a cozy, small space.
Lastly, nestling your patio up against a house wall or in a corner is a great way to ensure that what goes on in your backyard, stays in your backyard.
Create a low-cost outdoor kitchen

High-end patios often include a flashy outdoor kitchen or an outdoor bar. Although the kitchen alone could blow your budget, it’s possible to install an affordable food prep space or bar in your outdoor area.
Pro tip: For less than $200, you can build a cheap-and-easy food prep station. Just connect an outdoor sink to a garden hose—or use camp sink with a reservoir of water. A gas grill and outdoor folding table can finish off your budget-friendly outdoor kitchen.
DIY outdoor furniture
You can find affordable outdoor dining sets for your outdoor dining area at home improvement stores and online retailers. You could also create your own dining furniture using salvaged tables and chairs, preserved with a healthy dose of polyurethane.
Another way to save money on your patio project: Scout used furnishings from second-hand stores or yard sales. Used Adirondack chairs from wicker or wood, for example, can be freshened up with a new coat of spray paint.
You can also re-cover seat cushions or outdoor pillows using fabric remnants found at a local craft store.
Decorate with plants and rugs

Plants are another inexpensive decorating idea for backyard projects. Succulents are durable and low maintenance. Climbing plants could be trained to crawl up a trellis—tied to it with string—for an attractive vertical garden.
Use a collection of terra cotta pots or planter boxes from second-hand stores, or buy an outdoor planter that fits the style of your patio. Planters are available in wood, metal, concrete, and plastic for relatively affordable prices.
Outdoor rugs and other home decor can be found at minimal cost and in a range of fun outdoor patterns. They’ll add warmth and elegance to a backyard patio or define a seating space.
String lights for a magical look

Lighting adds elegance to your patio space for evening gatherings. There are many options for weather-proof LED outdoor lights. For a truly magical look, consider using string lights to create an illuminated roof over your outdoor space.
Using inexpensive, energy-saving solar lights eliminates the need to route electricity to your patio and creates a striking border. You can buy solar spot lights for under $10 each—and they are completely energy free! For more outdoor lighting ideas, see 7 outdoor landscape lighting ideas for your home.
When to call a patio installer or landscaping pro
As home DIY projects go, putting in a patio can be relatively doable and affordable. If the job is more than you want to tackle, enlist the help of a professional landscaper or patio contractor.
Patio projects can naturally lead to landscaping additions or improvements. Rather than working on your backyard piece by piece, consider hiring a landscaping pro who can offer a more holistic approach to backyard landscaping and design ideas.
How patio builders have helped Yelpers

When you’re hiring a patio builder for an outdoor project, it’s important to find a trusted professional. Yelp reviewers share their experiences.
From embarrassing to entertaining…
“I hated my backyard. It was a mess of dirt, broken concrete, and weeds. I was embarrassed and never wanted people to see it,” admits Justin J. of San Diego. “System Pavers totally transformed it and we have more room for entertaining. The back patio, albeit small, is a place that I’d like to spend more time. I’ve been showing all my friends and couldn’t be happier.”
Pavers vs. poured concrete…
“We made the decision to install pavers because of their superior impact on the environment over poured concrete,” explains Becca H., Sacramento, California. “The Paver Company turned our environmental impact into something that added incredible aesthetic value to the house and community.”
Picking the right pavers…
“Octagon Pavers and Outdoor Living has a good knack for knowing what style of paver fits your property,” writes David B., Redwood City, California. “Twice he made recommendations about our project that involved what I thought were minor issues relating to style of paver and creation of the border, and twice his insight proved correct.”
Find a professional landscaper
Tell us about your backyard patio project and we’ll connect you with trusted local pros