How to redo kitchen cabinets (or hire a pro)
How to redo kitchen cabinets (or hire a pro)
Key takeaways
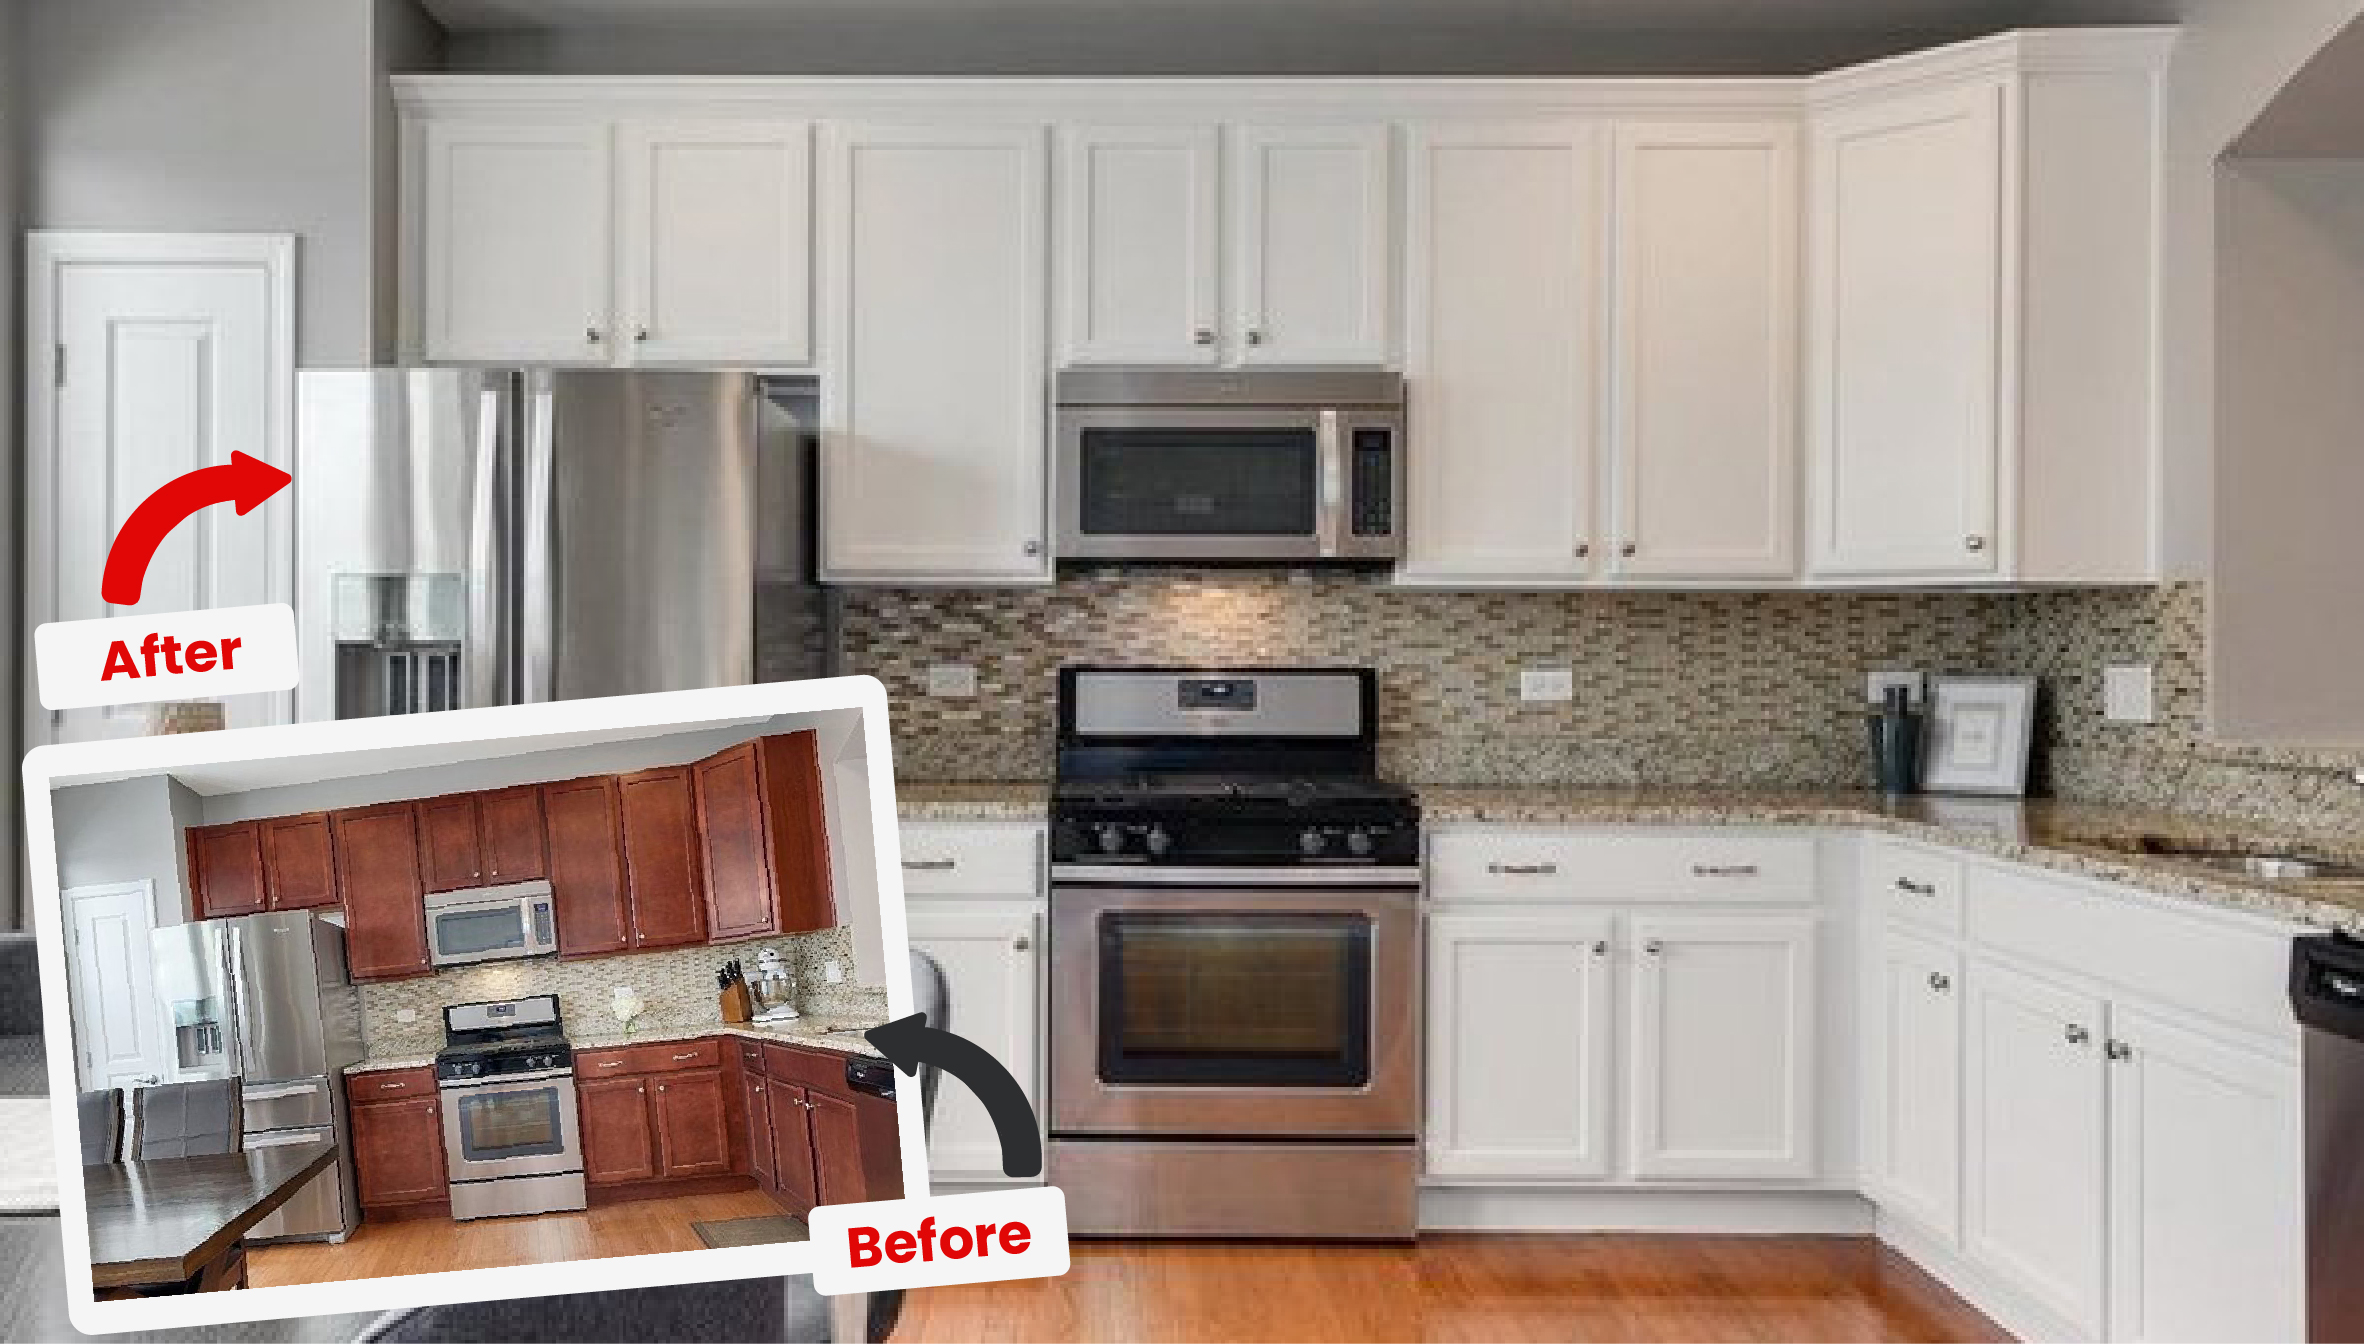
Giving wood cabinets a facelift can improve your kitchen’s look for less
If you have patience and basic skills, painting or staining cabinets can be a DIY project
Hiring a professional kitchen cabinet refinisher will cost more but ensure a quality job
Chipped, peeling, or faded wood cabinets make a kitchen look dated and depressing. Staining or painting them, however, can instantly refresh the room for far less money than buying brand-new ones. In fact, refinishing built-in kitchen cabinets is a high-impact makeover that will leave the space more inviting to you and attractive to potential buyers.
Home buyers want a kitchen that’s functional and attractive, according to home improvement expert Danny Lipford, host of TodaysHomeowner.com. If the kitchen is spacious and fills those needs, he explains, it can easily be refreshed as trends come and go.
And all you’ll need for a newer, brighter kitchen is a cabinet update. To make refinishing cost-effective, cabinets must be solid wood (cherry, maple, birch, or oak cabinets) and structurally sound—not warped or splintered.
While cabinet refinishing can be a DIY project, hiring a professional cabinet refinisher often yields the best results. Here’s how to give your old kitchen cabinets a new-kitchen look, whether you do the job yourself or hire a pro.
Cabinet refinishing options

To help you decide which way to go, paint, hardware, and home-improvement stores will often let you order samples of stained or painted wood. Here are your main options:
Stained cabinets are attractive, timeless, and warm up any kitchen. Clear stain offers a natural, weathered look for rustic settings. Medium gray stain gives a neutral, modern farmhouse appearance. Medium or dark or brown stain adds richness yet still allows the wood’s grain to show.
Painted cabinets can either match your kitchen’s wall color or create a dramatic contrast, as long as you don’t mind covering the wood’s grain. White cabinets are timeless and make the kitchen feel large, light, and airy, but a popular practice now is to pair white uppers with richly colored bottom cabinets.
New hardware will complete the transformation once you have freshly refinished cabinets. You’ll need to choose drawer pulls, knobs, or a mixture of the two. Knobs are small, affordable, and easier to install because they require just one screw to secure. Pulls are bigger and more expensive, but they’re easier to grip and make a visual statement. If you choose to go with a mix of knobs and pulls, keep it consistent. For instance, you can use pulls on all the drawers and knobs on the doors.

DIY cabinet refinishing
DIY kitchen cabinets refinishing is easier than you may think—on a difficulty scale of 1 to 10, it’s about a 5 or 6. For the average 150-square-foot kitchen with 12–15 cabinets, the project will take 2–5 days to complete at a cost of $200–600, depending on the products chosen.
Here are the basics, step by step:
Prepping for the job
Whether you stain or add a fresh coat of paint, the prep work is similar:
Cover your backsplash, countertops, moldings, appliances, and floor with plastic to protect them from overspray.
Remove cabinet hinges with a screwdriver, pull off doors, drawer fronts, and hardware, and set them aside. Place doors on 2×4’s resting on sawhorses, and open any windows and doors for ventilation.
Put on a dust mask and safety goggles to protect yourself from fumes and wood dust.
Dip a clean cloth in mineral spirits and wipe down the cabinet “boxes” (the frames attached to the wall, which will also be refinished), along with the doors and drawer fronts.
Sand the boxes and each door and drawer front with a sheet of 220-grit sandpaper, working in the direction of the wood grain. You can fold the sandpaper in thirds and use one piece at a time or speed up the process with a power tool. Many hardware stores carry corded palm sanders for about $20—these work well for flat areas, but use a sanding sponge for curved edges and recesses.
Wipe down the boxes and cabinets with a damp cloth to remove dust.

Photo: Dave the Kitchen Guy, Chicago
How to stain kitchen cabinets
Grab a stir stick and mix stain until it’s blended.
Dip a paint brush into the can, remove excess paint, and brush it onto the cabinets in one direction using long, straight strokes.
Let the stain dry according to the product’s direction—6 hours should be enough—then apply another coat. Some staining products may require light sanding with 220-grit sandpaper between coats; always refer to the manufacturer’s directions for proper application and to achieve the best results.
Let the final coat dry and repeat the same steps with the boxes.
Reattach cabinet doors and install new hardware if you’re replacing it. Buying new hinges, knobs, and/or pulls with the same footprint as the old ones will simplify installation because you won’t need to drill new screw holes or fill in old ones.
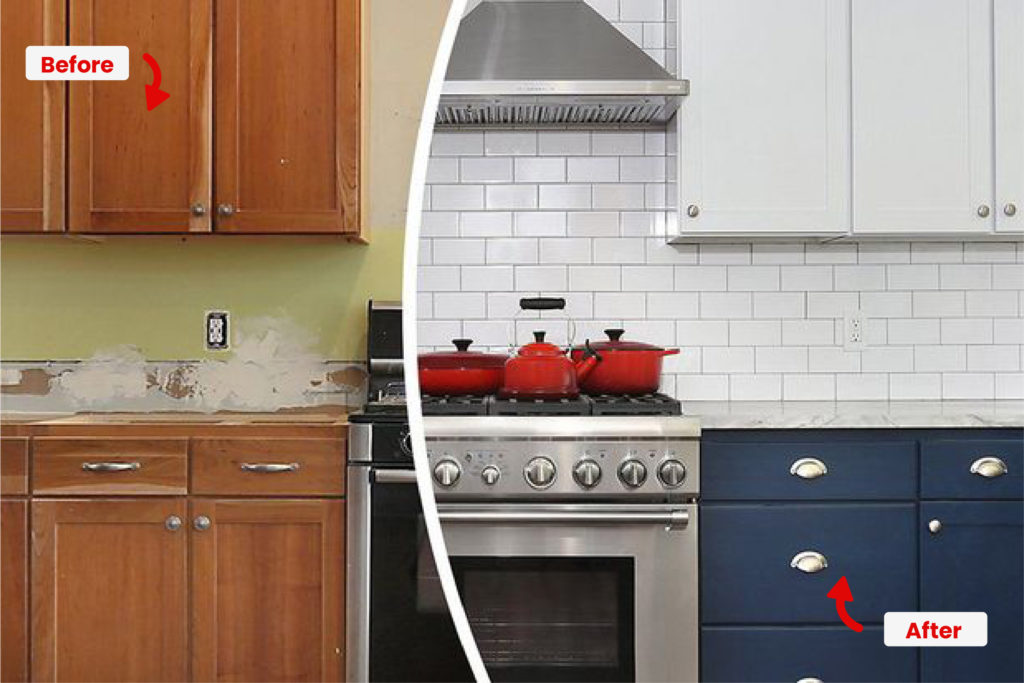
Photo: N-Hance Wood Refinishing Flushing, New York
How to paint kitchen cabinets
Fill any nail or screw holes with automotive body filler, a polyester resin with a cream hardener. This putty-like product is used to repair minor vehicle damage but it’s also an alternative to soft wood fillers. That’s because it serves as an adhesive and, once hard, can be cut and sanded. Once you’ve filled holes on the cabinets, caulk visible cracks for a finished look.
Apply primer, which blocks stains and helps new paint adhere, and let it dry. You can apply primer (and paint, which is the next step) with a foam brush for a smooth finish and sash brush to access grooves—or use a high-volume, low-pressure paint sprayer, which costs just $60 at the hardware store. If you use a sprayer, wear a respirator to protect your lungs.
If you prime or paint with a brush: use light, thin strokes and work in one direction to avoid bristle marks and clumping.
If you prime or paint with a sprayer: Begin and end each pass beyond the edge so there’s no buildup.
Apply the finish paint with a finishing brush. Let it dry, then sand with 220-grit sandpaper before applying another coat. Use enamel paint for its durability and water-resistant glossy finish.
Allow the paint to dry thoroughly and repeat the same steps with the boxes.
Replace the hardware.

Pro tip: Don’t trash old hardware—donate or repurpose it. Habitat for Humanity ReStores across the country accept home-improvement items and sell them at a fraction of the retail price. Even if your hardware is too outdated to give away, you can use it in other DIY projects. Attach old cabinet knobs to wine corks for stylish bottle stoppers or refashion them as legs for serving trays. You can find plenty of inspiration on social-media sites such as Pinterest.

Photo: Peroogy Construction and Remodeling Services, Houston
Hiring a pro
Contracting a professional to give your kitchen cabinets a new look will cost more than DIY but less than replacing existing cabinets. And you may find that the results are worth it. Plus, you’ll gain peace of mind from working with a company that has refinished hundreds, if not thousands, of cabinets.
Professional kitchen cabinet refinishers charge around $4–10 per square foot, including labor and materials. Actual costs vary based on cabinet condition, unique needs, and style choices. The final cost for cabinets in an average kitchen can range from $1,500–$2,500. To learn more, see Cost of cabinet refinishing and Cost of cabinet painting.
Here are some tips for finding the right pro:
Ask friends and neighbors for recommendations, and search online reviews, to find skilled and experienced companies in your area.
Make sure they have a certificate of insurance to guarantee general liability coverage. If they have employees, confirm that workers’ compensation insurance is in effect.
Get a written contract. It commits them to following specific prep and application methods, using quality materials, and cleaning up properly.
Agree on the payment schedule. You may be expected to pay 10% or 50% upfront and the rest when the job is complete. Just be sure the terms are in writing.
Pro tip: Prep work is the most difficult and time-consuming part of any cabinet refinishing project. You may be able to negotiate a lower price if you tackle some prep yourself before the pros arrive, as well as reattaching the doors and hardware after they leave. If you go this route, remove, clean, and degrease cabinet doors and prepare cabinet boxes for refinishing.

Photo: Cooks Kitchen Cabinet Refinishing, Brookfield, Illinois
How cabinet refinishers have helped Yelpers
Whether your kitchen cabinets need to be stained or painted, it’s important to find the right refinisher for the job. Yelp reviewers shared their experiences:
A mess-free transformation…
Yelper Caryn M. says, “[Eagle Eye Painting in Seattle] does amazing cabinet painting! In just 7 days they transformed my kitchen and master bath, where dark walnut cabinets were making my space look very dated. They provided 8 1/2 x 11″ samples so I could be sure of my color choice in all kinds of lighting. Their prep is impeccable and the way they tent off areas to contain any spray or mess is impressive. And when they break down and leave, it’s so clean it’s as if they were never there. They perfectly filled some large holes in the microwave cubby and installed my new cabinet pulls.”
Modern look speeds condo sale…
“Clancy and his team [at Modern Masters Painting in Park Ridge, Illinois] gave my cabinets a great look and helped with new hardware installation,” says Yelper Michael G. “I had my place on the market for 5 months before this work was done. After the work was done I had an offer in 2 weeks. I really believe the fresh modern look Clancy gave my kitchen helped with the quick sale of my condo.”
Attention to detail is unmatched…
Yelper Savannah T. says, “Sean [with Clean Cut Painting in Atlanta] recently painted our kitchen and living room area. He did an incredible job, his attention to detail is unmatched! I was very impressed and we will definitely be calling him in the future for more projects!”
Find a professional cabinet refinisher in your area.
Find a good contractor
Tell us about your kitchen project and we’ll connect you with trusted local pros.